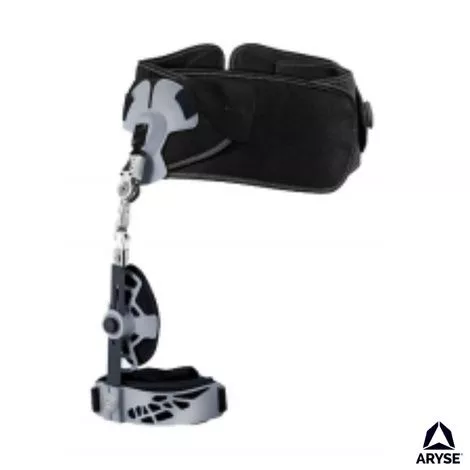
TRU-RANGE® Hip Brace Scope of Application
- Acetabular impingement
- Anterior or posterior hip dysplasia
- Arthroplasty
- Dislocation stabilization
- Femoroacetabular impingement
- Hip fractures
- Lumbago
- Lumbar disc displacement
- Lumbosacral spondylosis
- Osteoarthritis
- Post-surgery recovery
- Sprains and strains
- Among others
Directions to Use TRU-RANGE® Hip Brace
- Brace comes with three components: back brace component, right hip component, left hip component.
- To adjust back brace component, lay waist belt out flat with interior view facing up
- To resize, adjust right and left belts by sliding belt through d-ring to desired size and reattach to itself
- Remove hook-and-loop cover and wrap belt around waist at midsection and secure at front of body
- Attach hip component(s) for right or left side as necessary with hook-and-loop fasteners, aligning with hip(s). Plastic cuff should be on front of leg. Both right and left hip component can be used simultaneously for bilateral support
- Hip component length and thigh pad height can be adjusted by loosening plastic thumb screw
- Wrap cuff strap(s) around leg(s) just above the knee and secure hook-and-loop fasteners. Strap(s) can be cut to eliminate excess fabric
- Tighten back brace component to desired comfort level using pulley system
- Use allen wrench for varus/valgus adjustments to hinges found at ball joints. Adjustments should only be made by a medical professional
- Directions for Setting ROM Hinge
- Flexion and extension range-of-motion settings on hinge can be adjusted by loosening star screw with star wrench
- Use tabs on hinge to set flexion/extension
- Lock into place by tightening star screw in the middle of ROM hinge
- The range-of-motion settings should only be adjusted by a medical professional.