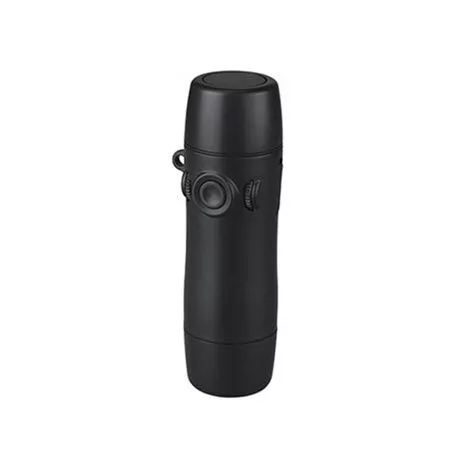
Features of Atos Provox TruTone Electrolarynx
- Advanced, premium-quality speech aid for a more natural expression
- Allows changes in voice volume from whispering to loud
- Allows for variance in the tone of voice for a more natural expression
- Improve the transmission of sound that can help people with hearing issues
- Up to one-month battery life and USB charging
- Most users experience 25-35 days between charges
- Charges just like your phone
- Comfortable and ergonomic hourglass design
- Good speech intelligibility
Useful Manuals
- Provox TruTone Emote User Manual
- What is an Electrolarynx?
- Basic Training Guide-Electrolarynx (EL)
What to buy with Speech Aid Device
- BIGmack Communicator
- Chattervox Voice Amplifier Headset Microphone
- Announcer with Six Levels
How to use Provox TruTone Emote?
Part specification
- A. Sound head (x2) (including sound button and foam ring)
- B. Sound head spacer
- C. Power button
- D. Volume knob
- E. Body
- F. Battery
- G. Battery cap
- H. Battery connector
- I. Oral tube (2 + 2)
- J. Oral adapter
- K. Tone (pitch) adjustment knob
- L. LED indicator light
- M.MODE button
- U. USB dust cover
- V. USB charge jack
Provox Electrolarynx Operating Instruction
Volume level and power
- The volume knob (D) all the way down is off.
- Turn the device on and adjust the volume by turning the volume knob upwards (D).
Adjusting tone
- • Adjust the tone by turning the tone adjustment knob (K).
- Keep the power button (C) pressed while making your initial adjustment to hear the differences.
- Using the tone knob (K) without holding the power button (C) still changes the tone without the ability to hear it.
Setting the mode
- To change the mode, first remove the battery cap, then press both the mode button (M) and the power button (C).
- The mode changes immediately, but if you continue to hold the power button, the device will beep to indicate the new mode setting.
- The number of beeps and the tone of the beeps indicate which mode it is in.
Choosing sound head
- If you have hard neck tissue or are in a loud environment. The grey sound head can be used because of its sharper sound.
Using the sound head spacer (B)
- If you regularly use a higher tone and prefer the tonal qualities without a sound head spacer, you may remove it.
Charging battery
- Pull the USB dust cover (U) out at the top end.
- Insert micro-USB into the USB charge jack (V) with an approved plug for wall charging.
- Check that the LED indicator light (L) is lit.
- Unplug the unit when the charging is complete to conserve power. Use until volume begins to fade, which is at 80% drained.
LED indicator light (L)
- Low battery – The light turns on when you press the power button, signaling it is approaching time to charge.
- Charging – Solid light
- Complete charging – Flashing light
Atos Electrolarynx neck placement
- Place the sound head (A) against your neck and activate the power button (C).
- Do not insert any part of the device or accessories into the stoma.
- Speak as sound is carried into your mouth. Do not force air out.
- Ensure an airtight seal between the sound head and your neck.
- Try different positions until you get the best sound. Note that even a 3 mm / 1/8″ position change can have a great impact on the sound volume.
- If you cannot achieve sound transmission through your neck or place the device against your neck for medical reasons, try cheek placement or use the oral adapter.
- Adjusting the base tone up or down may produce a better voice.
- Mid-range tones are easier to hear for most people.
How to clean Provox Electrolarynx?
- Maintenance actions are the responsibility of the user. Maintenance should be performed after each use.
- Wipe the device with a clean, dry cloth or, if necessary, a slightly damp cloth (not dripping wet).
- Use water with mild soap or Isopropylalcohol 50-75%.
- Be careful not to get moisture inside the device
- Do not use electrical or spray cleaners